

Grafting Basics
When you have a tree that produces plentiful delicious fruit, you can propagate those benefits onto a sapling through the method of grafting.
For example, a particular Jamun tree has been fruiting successfully for years, so to ensure that the growing Jamun offspring produce fruit of the same great flavor Rishi grafted a branch from the mother tree onto all of the young ones.
Here is what you will need:
- a young tree
- a mature branch
- a pair of pruning shears
- a sharp carving knife
- parafilm (or another joining material)
- strong tape

(Final Product)
Step 1: Choosing the Right Pair
clip the young trunk so that its width matches the mature branch's width.
it is important to match the widths nearly identically. doing so will increase the likelihood of successful grafting.

Step 2: Making Room for the Bloom
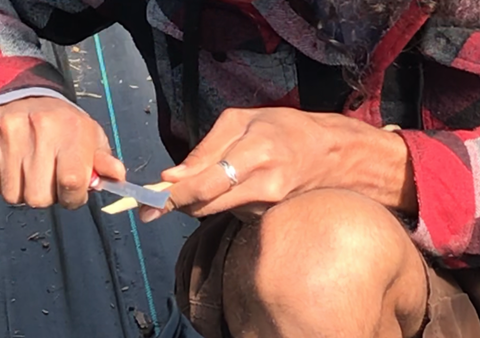
carve the mature branch into a penetrating V-shape, aiming to make the tip very thin.
pro-tip: expose as much of the green material in the branch as possible when carving. that is where the branch and the trunk will merge.

split the young tree's trunk down the middle as far down as the length of the V. then, insert the branch into the trunk's slit.


Step 3: Fastening & Protecting the Joint
tightly and firmly, wrap the branch and the top of the trunk in parafilm (or substitute) with close attention to the joining spot.
pro-tip: beware air bubbles! they are the enemy of a good grafting job.

once the new trunk is covered, fasten the joining spot with tape.

repeat as needed. Farmer Rishi grafted several Jamun trees after this demonstration and we are seeing some positive results! Check out our available trees in our nursery.

–– Anna Saucedo, Farm Documentarian